Wednesday 4 June 2014

Sunday 11 May 2014

Process of developing photographic film


 Preparing scissors, developer reel, developing tank, ILFOSOL 3, ILFOSTOP and Rapid fixer.

1)   Switch off the light.

 2)   Open the top of the film with scissors in the dark.

 3)   Cut the top of the negative film in the dark, then cut off the spool.

 4)   Find the two triangle shape in your developer reel with the opening in the sleeve facing you. Push the film in and turn it.
 5)   Set it in the developer tank and close it.
 7)   Switch on the light.

 8)   Preparing chemicals to developing film.

 9)   First chemical is ILFOSOL 3, use at dilution of 1+31 and pour in developer tank until 6 minutes.

 10) Continuous shaking the developer tank in first minute, then rest the tank 30 seconds. Continue shaking the tank until 30 seconds and do the same process on a steps.Continuous shaking the tank in last minute. Drained it. Tap the tank  firmly can dislodge any air bubbles.

 11) Second one is MULTIGRADE,  use at dilution of 1+19and pour in tank.(3 minutes). Technique like used ilfotec hc.

 13) Third chemical is RAPID FIXER, use at dilution of 1+9 and pour in tank. (5 minutes). Technique like used the above.

 14) Finally put film negative into flowing water and let it air-dried.


developer reel(The things e use to role the film and put to wash)
ILFOSOL 3, MULTIGRADE ,RAPID FIXER(chemical to wash the film)
Put the film inside and role it.


After  done it role the film u put it at the black beaker as u saw

mix chemical


Sunday 4 May 2014

Relationship Between Aperture and Shutter Speed


Now it's time in waiting to see, that is to understand the relationship between aperture and shutter speed in acquiring the best light control. If in the examples above, we only use either aperture or shutter-speed only, this time we will try also setting 'manual' by controlling their values ​​simultaneously. This is because we can obtain a better light control and manipulate both correctly.


 The figure below:


aperture dan shutter speed
http://dululainsekaranglain.com/fotografi/asas-fotografi-memahami-aperture-dan-shutter-speed/attachment/aperture-dan-shutter-speed


Aperture settings are called f-stops and indicate the size of the aperture opening. Each f-stop lets in half as much light as the next larger opening and twice as much light as the next smaller opening. From the largest possible opening to increasingly smaller ones, the f-stops have traditionally been those shown to the left. No lens has the full range of settings; for example, the standard lens on a digital camera will range from about f/2 to about f/16. Notice that as the f stop number gets larger (f/8 to f/11, for example), the aperture size gets smaller. This may be easier to remember if you think of the f-number as a fraction: 1/11 is less than 1/8, just as the size of the f/11 lens opening is smaller that the size of the f/8 opening. Many high-end digital cameras have added one or two stops between each of the traditional ones. In the table to the left one-third and one-half stops are shown in red and blue respectively.
How wide you can open the aperture depends on the lens maximum aperture— its widest opening. The term "fast lens" usually applies to lenses that can be opened to a wide maximum aperture for the focal length. For example, a lens with a maximum aperture of f/1.8 opens wider, and is faster, than a lens with a maximum aperture of f/2.6. Faster lenses are better when photographing in dim light or photographing fast moving subjects. With most, but not all, zoom lenses the maximum aperture changes as you zoom the lens. It will be larger when zoomed out to a wide angle, and smaller when zoomed in to enlarge a subject.


Gambar kredit kepada digitaldiver.net


Shutter speed


The shutter speed is one of two fundamental controls for regulating the brightness of your pictures. Your camera’s shutter speed setting works in tandem with the aperture to ensure that you can get a perfect exposure in a huge variety of lighting conditions.

Shutter speeds are easier to understand than apertures – as the scale used is far more straightforward. The speed – the duration for which the shutter is open – is measured in fractions of a second. A 1/1000 sec shutter speed lets through half as much light (all other things being the same) as a 1/500 sec setting.

The shutter speed range is much more extensive than that afforded by the aperture range on even the most expensive lenses. The top speed on many digital cameras is either 1/4000 sec or 1/8000 sec. The longest automatically set shutter speed is usually 30 seconds – allowing 17 or 18 more stops of light to reach the sensor (up to 250,000  times more light).

Use the Bulb mode setting and the shutter will remain open for as long as you keep the shutter release pressed, so can be stretched to whole minutes – or even hours.

Chances are you’ve figured this out already, even if you’re brand new to photography. But have you ever thought about how your camera shutter actually works to regulate the brightness of your photos?
Your camera’s shutter: so how does it actually work?

Shutter speed is one of those fundamental controls on our camera that we take for granted, but knowing how it works will give you the knowledge you need to start taking pictures with more authority. Our latest photography cheat sheets illustrate how each component of your camera’s shutter works in tandem.

Your camera’s shutter controls how long the sensor is exposed to light. It uses a pair of ‘curtains’ or blinds. One opens to start the exposure, and the other is closed to end it.

At slower shutter speeds, both curtains on your camera’s shutter are open for some of the exposure. At faster speeds (any speed above the ‘flash sync speed’ – 1/200sec on many models), the second curtain closes the opening as the first is still opening.

So your sensor is effectively exposed to the light through a moving slit. In our latest photography cheat sheets we’ve illustrated, first, how your camera shutter system uses its pair of curtains to expose an image through a moving slit; and in our second cheat sheet we’ve illustrated where each of the key components sit within your camera shutter, and how they work.


Your camera's shutter: so how does it actually work? (free photography cheat sheet)


What is Shutter speed???

  Shutter speed refers to the period of time the shutter is open to allow light in and the sensor. The shutter speed is calculated using the second (seconds) and usually lower than a second. Shutter speed 2 seconds will allow the entry of light over shutter speed 1/250 second for example.


  • Slow shutter speed = more light into the camera
  • Fast shutter speed = less light into the camera

 Now we will ignore just about aperture and shutter-speed look at only. In the dimly lit places, you will find that you have to use a slow shutter speed to get enough light for a good exposure.

In a bright light, you can use a shutter speed range from moderate to fast, but if slow or too slow will make the image becomes overexposed because too much light enters.

The effect appears to approximate the aperture is not it? But the cause of the image is not getting proper exposure for the aperture and shutter speed are different.

Shutter - Speed

Now we will ignore just about aperture and shutter -speed look at only. In the dimly lit places, you will find that you have to use a slow shutter speed to get enough light for a good exposure.
In a bright light, you can use a shutter speed range from moderate to fast, but if slow or too slow will make the image becomes overexposed because too much light enters.
The effect appears to approximate the aperture is not it? But the cause of the image is not getting the proper exposure for the aperture and shutter speed are different. Reread the above article to understand the aperture and shutter speed.
Before we go into a relationship of aperture and shutter -speed, let's look at the creative effects that can be produced by the shutter speed.
Freezing & Blurring Using Shutter - Speed
If you can manipulate using the aperture Depth Of Field to get creative results, the shutter - speed, you can also come up with something creative to freeze (freezing) the movement of an object, especially a fast and make the blur effect (blur) the image.
Action sports usually occurs quickly and with your regular camera will not take pictures with attractive and sharp. To stop / frozen right movement athletes, sports vehicles and so on, shutter -speed is set at a fast speed in which the shutter open overnight to capture the movement of the object. See the picture below:
Shutter -speed example

Gambar kredit foodrepublik.com
Image come from: http://dululainsekaranglain.com/fotografi/asas-fotografi-memahami-aperture-dan-shutter-speed/attachment/shutter-speed-example


At slow speeds 1/15 second, the shutter open longer and result looks like there is a shadow on the back of the above. But the fast speed of 1/200 second, the fruit can be frozen and the resulting sharp and bright picture.

penerangan shutter-speeds


 Rule of Thumbs: "While hand holding a camera, you shouldn't have a shutter speed slower than the reciprocal of the focal length of the lens". If you do not use a tripod, then this rule should you follow to prevent picture blur or shake when taken. Under this rule, if you are using a lens with a focal length of 100mm, so you can not select a shutter speed of less than 1/200 second.

Sometimes even using a slow shutter speed and make the image blur is an interesting and creative. See the picture below:


http://dululainsekaranglain.com/fotografi/asas-fotografi-memahami-aperture-dan-shutter-speed/attachment/shutter-speed-blur


------------------------------------------------------------------------------------

WORK SHUTTER SPEED FOR LIGHT

F3.6/ISO-100/20S

F3.6/ISO-100/20S


F3.6/ISO-100/20S


WORK SHUTTER SPEED FOR MOVING

F3.6/ISO-100/20S


Aperture on a camera and work....


Aperture on a camera

Aperture refers to the opening of a lens's diaphragm through which light passes.Aperture size is usually calibrated in f-numbers or f-stops. i.e. those little numbers engraved on the lens barrel like f22 (f/22),16 (f/16), f/11, f/8.0, f/5.6, f/4.0, f/2.8, f/2.0, f/1.8 etc.. The lower f/stops give more exposure because they represent the larger apertures, while the higher f/stops give less exposure because they represent smaller apertures. This may seem a little contradictory at first but will become clearer as you take pictures at varying f/stops. Be sure to check your manual first to learn how to set your camera for Aperture Priority, then try experimenting to get comfortable with changing the aperture and recognizing the effects different apertures will have on the end-result image.

Maximum and minimum aperture differ depending on lens


Note: The diaphragm blades inside this manual focus Canon FD lens control the amount of light passing through the lens that eventually hitting to the film during an exposure process. The 'amount', or simply explained in layman term - opening changes according to selection of aperture (f/number). In this case, it is indicated by the f-numbers that imprinted on the lens barrel.

If you try it getting the details please got to this video... 

 http://www.youtube.com/watch?feature=player_embedded&v=xg7_meg77Qw
-----------------------------------------------------------------------------------------------------------------------------
WORK

F29/ISO-200/13


F4.6/ISO-200/13


F 32/ISO-100/13


F13/ISO-100/13


F11/ISO-100/13


F10/ISO-100/13

F9/ISO-100/13

F8/ISO-100/13

F7/ISO 100/13

F6.3/ISO 100/13

F5.6/ISO-100/13

F29/ISO-100/13
F20/ISO-100/13
F 16/ISO-100/13

 F10/ISO-100/13

 F5.6/ISO-100/13


Monday 24 March 2014

The process of Pinhole Camera

To make your pinhole camera you will need a metal coffee can  paint can or any metal can. It’s nice to make more than one camera because you can reload and develop film paper in batches in your dark room:


Other supplies you’ll need:

Wood Clothespin 

A few small sewing needles
 Cloth tape
A piece of black construction paper

Black Sharpie marker
Scissors


Step 1: Using a scissors to cut the the top of can.(If u using a coffee can or other can got the cover just not need use the scissors to cut it)
 
Step 2: Create a “pinhole drill” to drill the smallest possible hole in your   can.  Here I’ve taken a small sewing needle and inserted it as shown into a clothespin (with about 3/8″ sticking out). It stays in place with  industrial glue (E3000) or super glue.  It will dull quickly so I recommend making more than one drill at a time
Step 3: Using a black marker to mark the point on the can.
Step 4:  Make it a cover using the scissors and black construction paper.

 Your pinhole camera is ready to go!

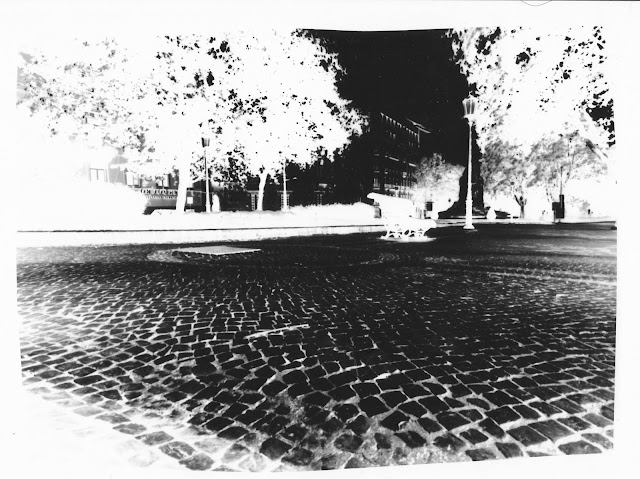
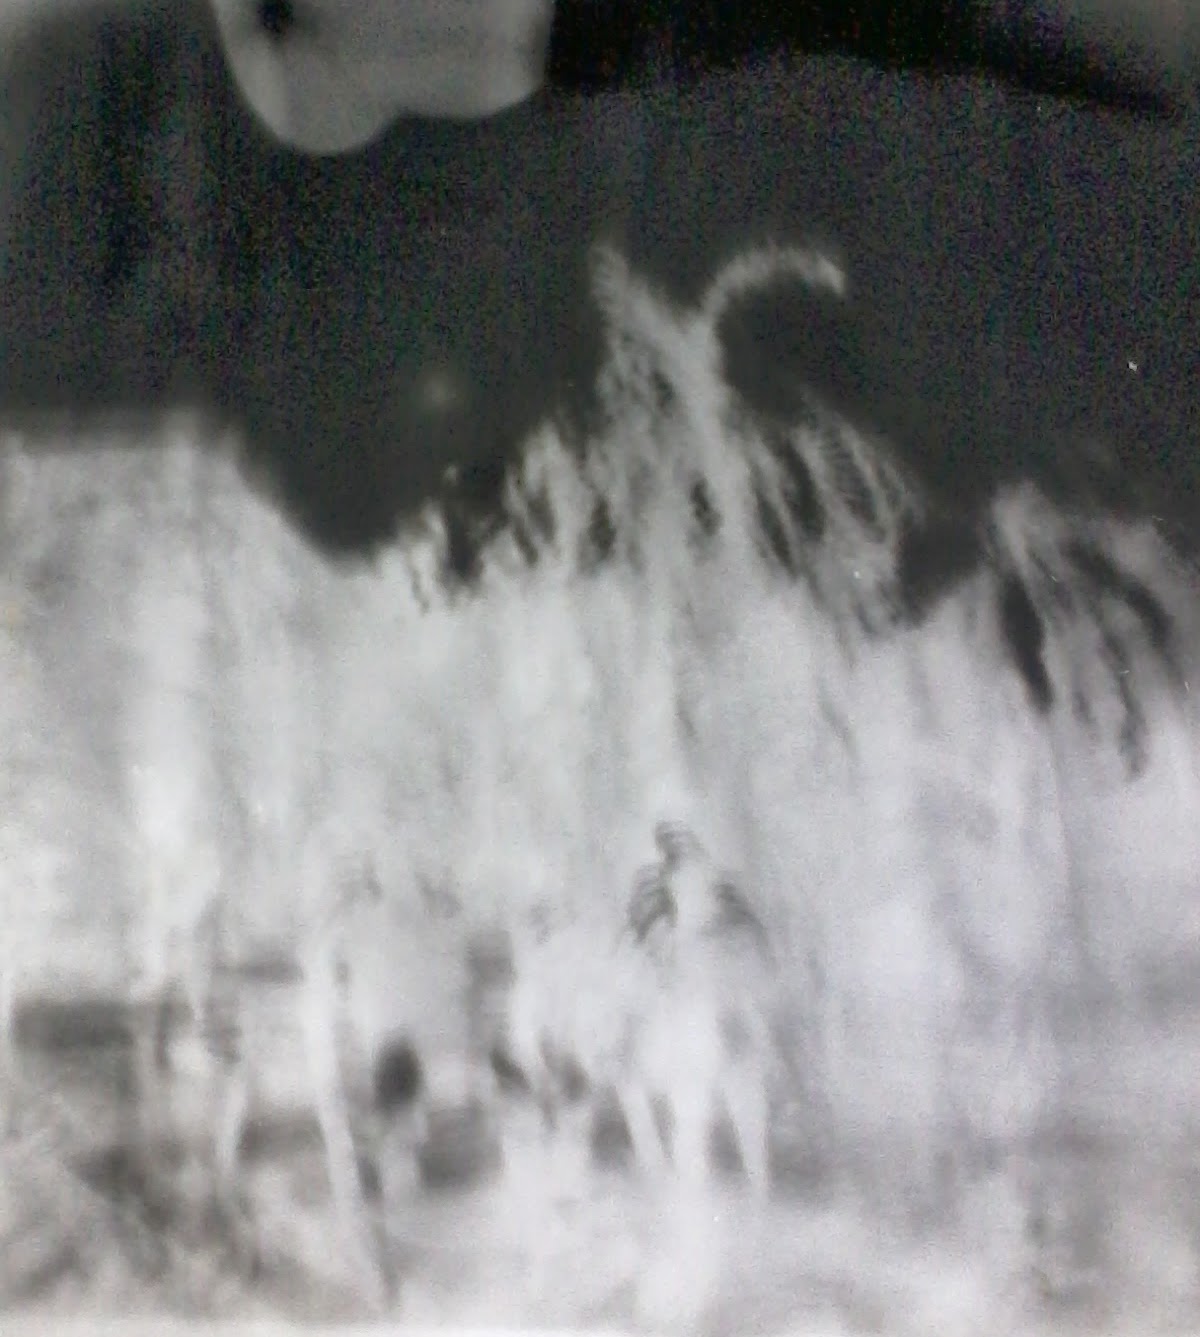
Now you can load the camera with B&W photo paper!  (I’m loading it in the light below so you can see it….but this must be done in the darkroom!) Take a piece of paper and place it into the camera as shown. The glossy side is the side that is light sensitive. Make sure that side is centered facing the pinhole.

After check it the pinhole camera, you can move out the paper and move your step into the dark room to put inside the photo paper(the pinhole photo paper cannot under light),but u want to cut it the size with your pinhole camera.

How to different the surface of the photo paper if is which want put inside front of the pinhole camera in the darkness???

U just use it your finger to feel it ,cause the photo paper got two surface.One face is ore soft.The face are the face put in front the hole.But if you also cant feel it got the other way,u just waste your finger and touch on the photo paper and you feel it the faces of the paper is sticky so is the surface put in front the hole.

----------------------------------------------------------------------------------
work.....
5 mint during the evening

10 sec

15 sec 

Failed